peanut butter

Peanut Butter Cup Pots de Creme

peanut butter cup pots de creme // Glazed & Confused

I think it's common knowledge that the combination of peanut butter and chocolate is one of the more important discoveries in human history. No really, who doesn't like the marriage of creamy (or crunchy) peanut butter and smooth, decadent chocolate? If you don't, I'm not sure if we can be friends. Sorry not sorry.

Although M&M's or Hershey's Kisses would probably considered the Mecca and Medina of American candy culture, the absolute orgasmicness (definitely not a word) of this wonderful flavor combination is the basis of the best candy in the world: the Reese's peanut butter cup. I know a thing or two about Reese's, considering that I practically grew up on them. My love was pretty intense at one point: my friend Connor and I used to text one another every time a Reese's pumpkin or Christmas tree or egg would pop up on shelves at our local supermarket. Talk about dedication. (Call me crazy, but don't the special holiday varieties just taste SOMUCHBETTER than the normal ridged peanut butter cup? I mean, I'll gladly take both, but the eggs are where it's at.) 

spreadable reese's!!!! // Glazed & Confused
spiced cocoa glazed peanuts  // Glazed & Confused

It was recently brought to my attention that spreadable Reese's is a thing. No, not the Reese's brand of peanut butter that you can get at the store and spend the next four days hating yourself for eating six straight spoonfuls of in a single sitting. Instead, Reese's went out and changed the game by making a Reese's-flavored peanut butter dip. Think Nutella, but Reese's-fied. 

After a late night trip to the holiday aisles of my local Walmart for peppermint everything, I went to go pick up some regular peanut butter for my daily banana + pb obsession that will never ever die. I was reaching up for my usual Jif Natural (with honey, of course) and then I saw it with my own two eyes: Reese's spread in the flesh. 

peanut butter cup pots de creme // Glazed & Confused

No lie, I was pretty weary over how it would compare to its candy counterpart, but a single teaspoonful had me dreaming about biting into a big ole Reese's cup, ridges and all. Seriously, this stuff is next level. I dropped everything I was doing and immediately baked my little heart away. 

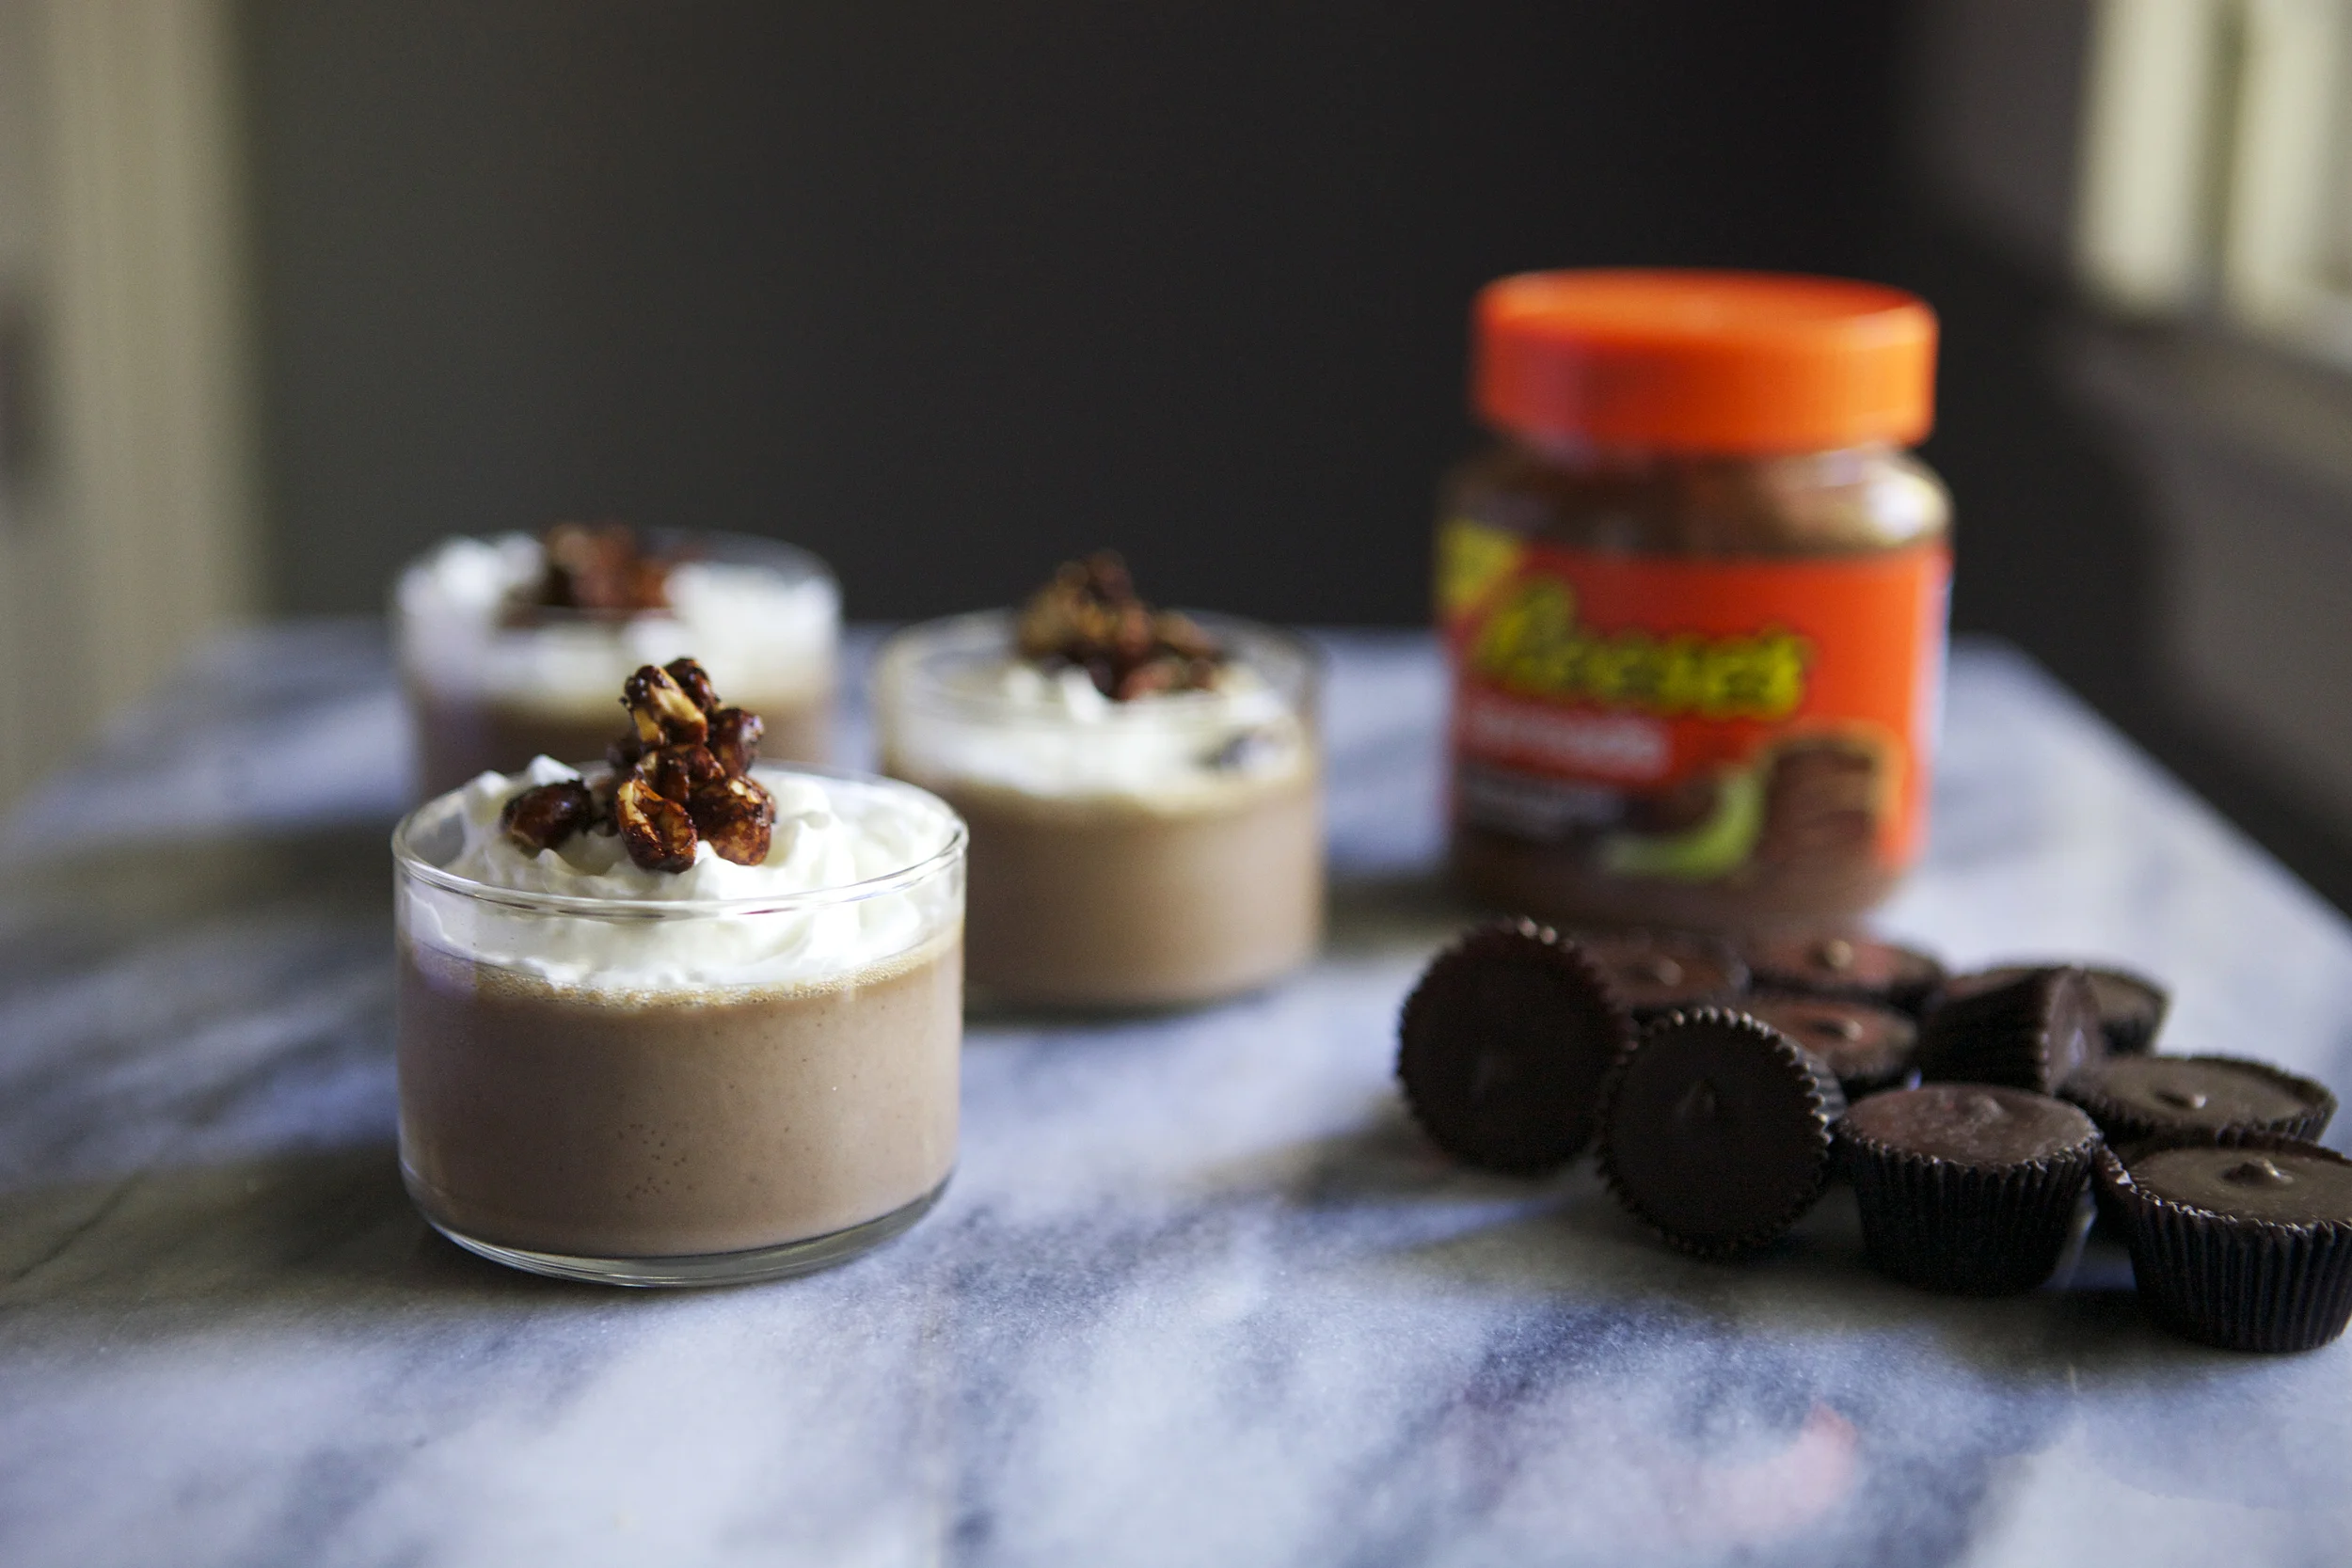
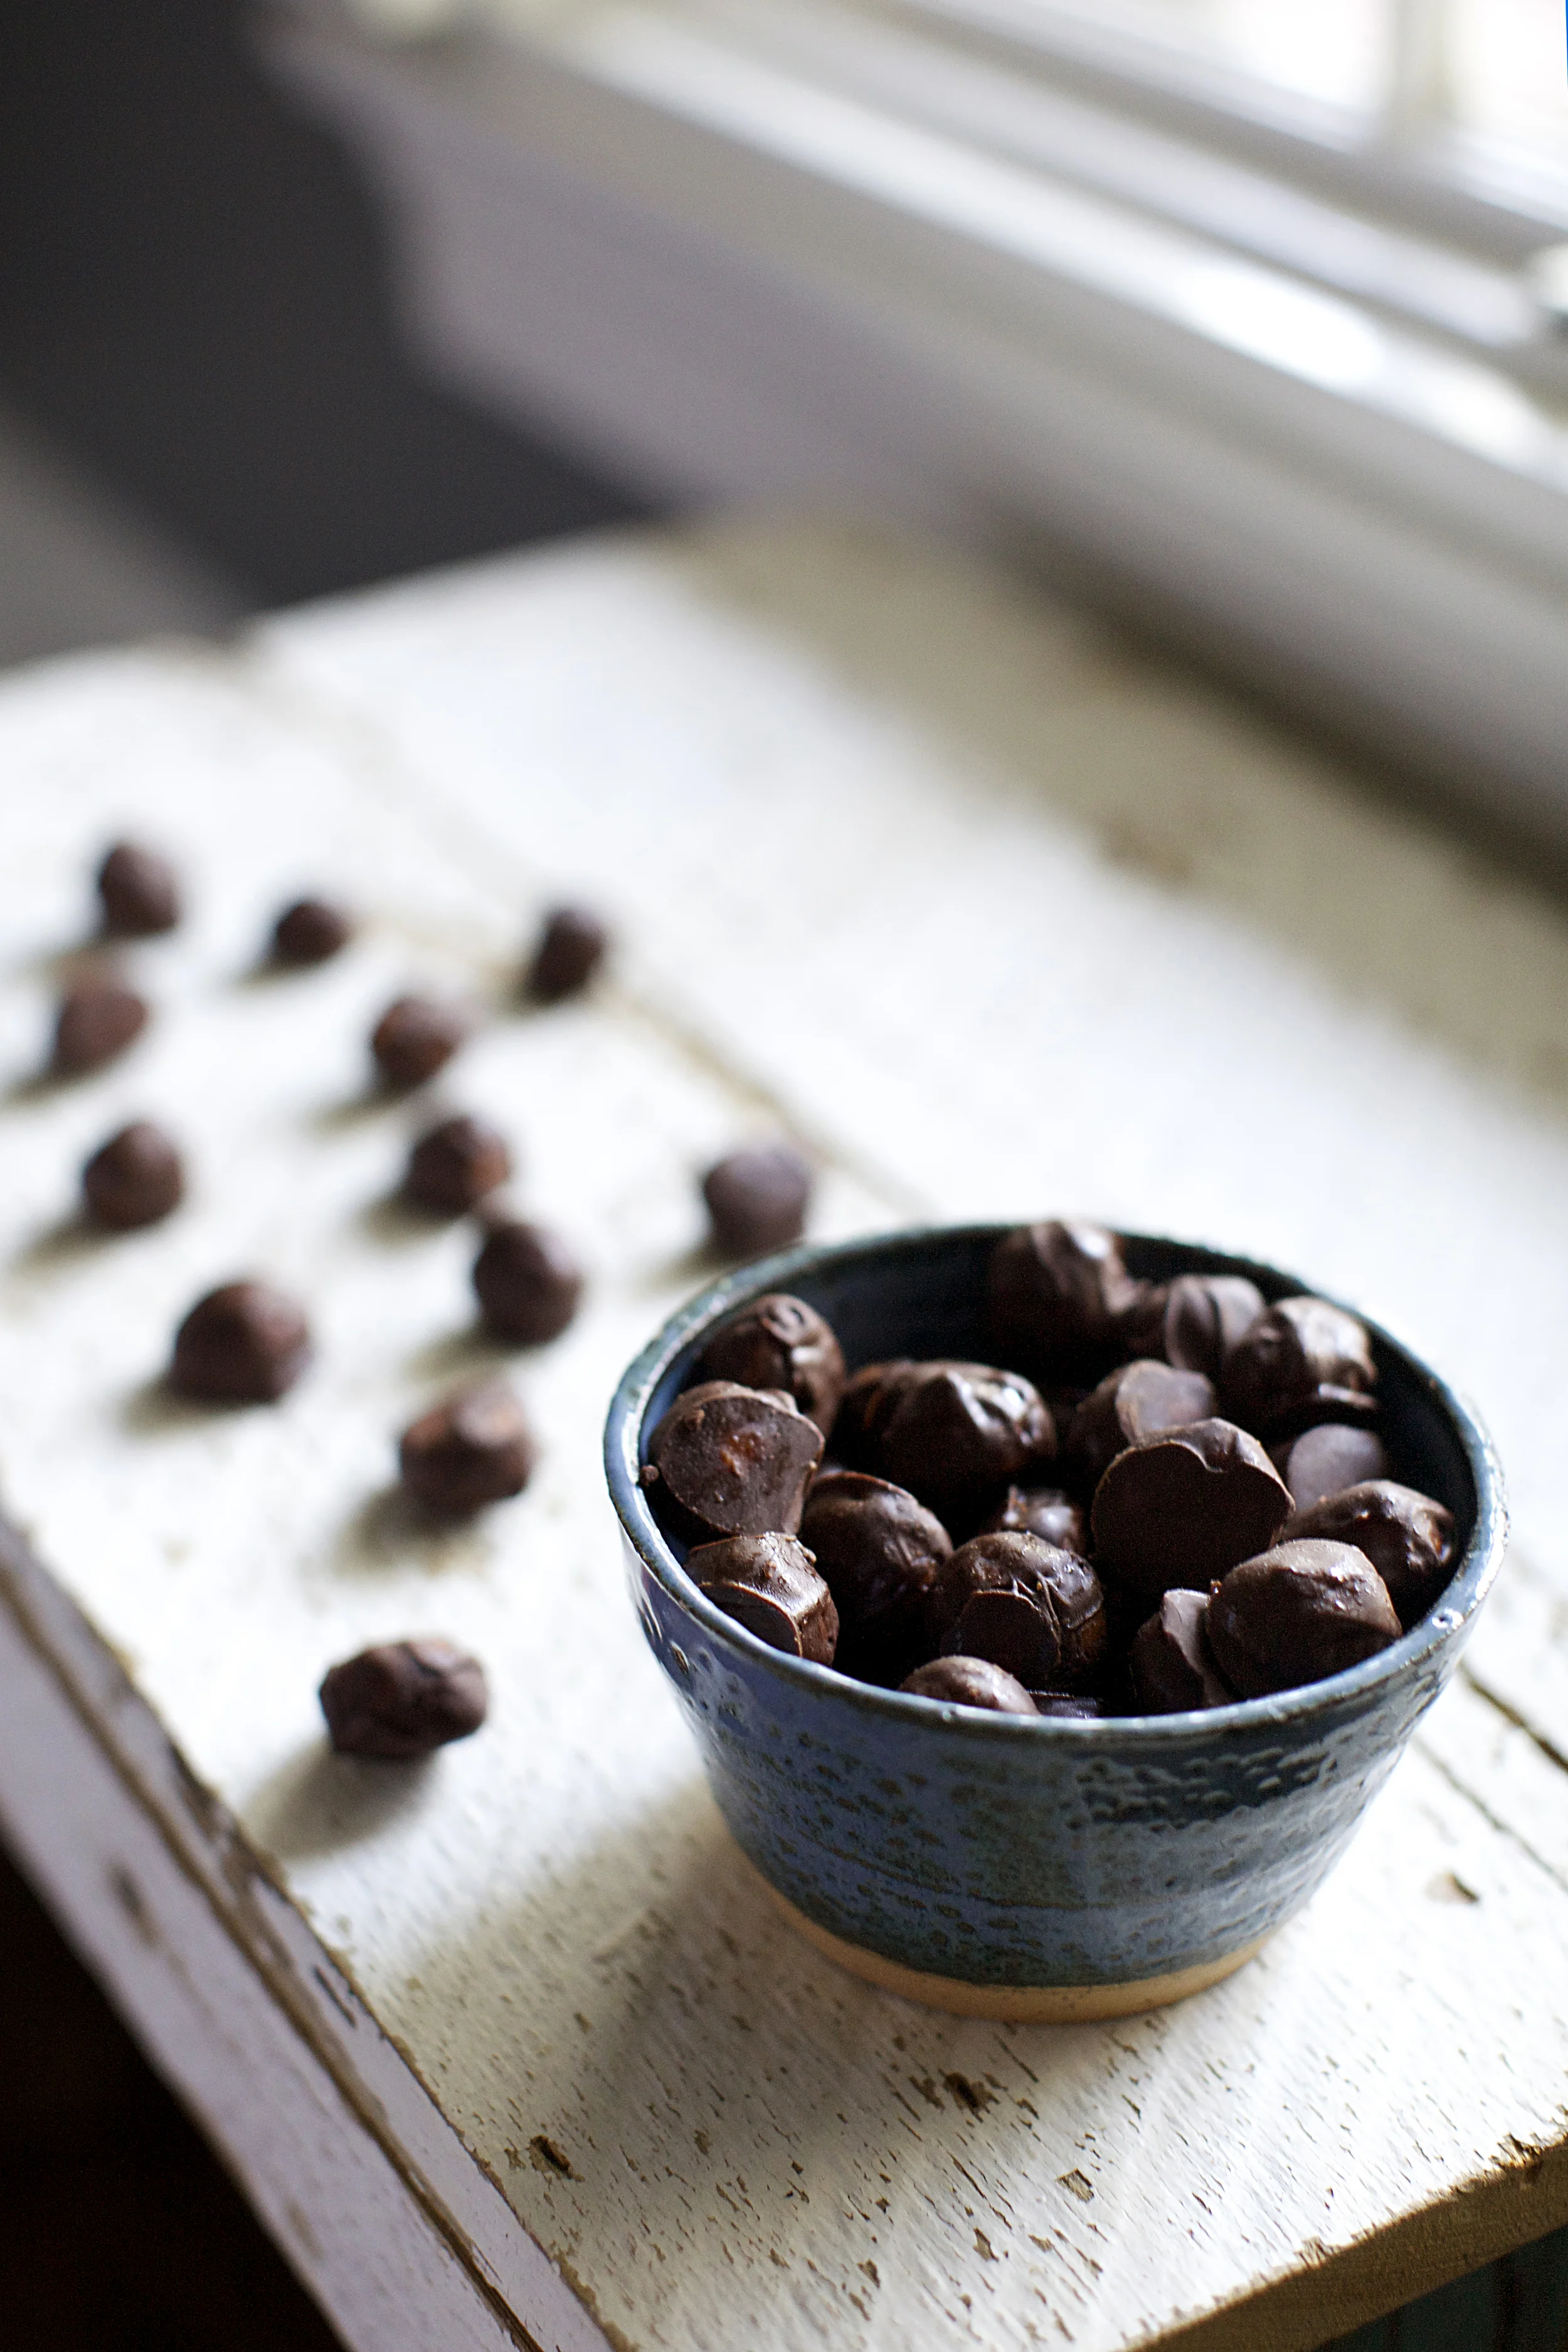
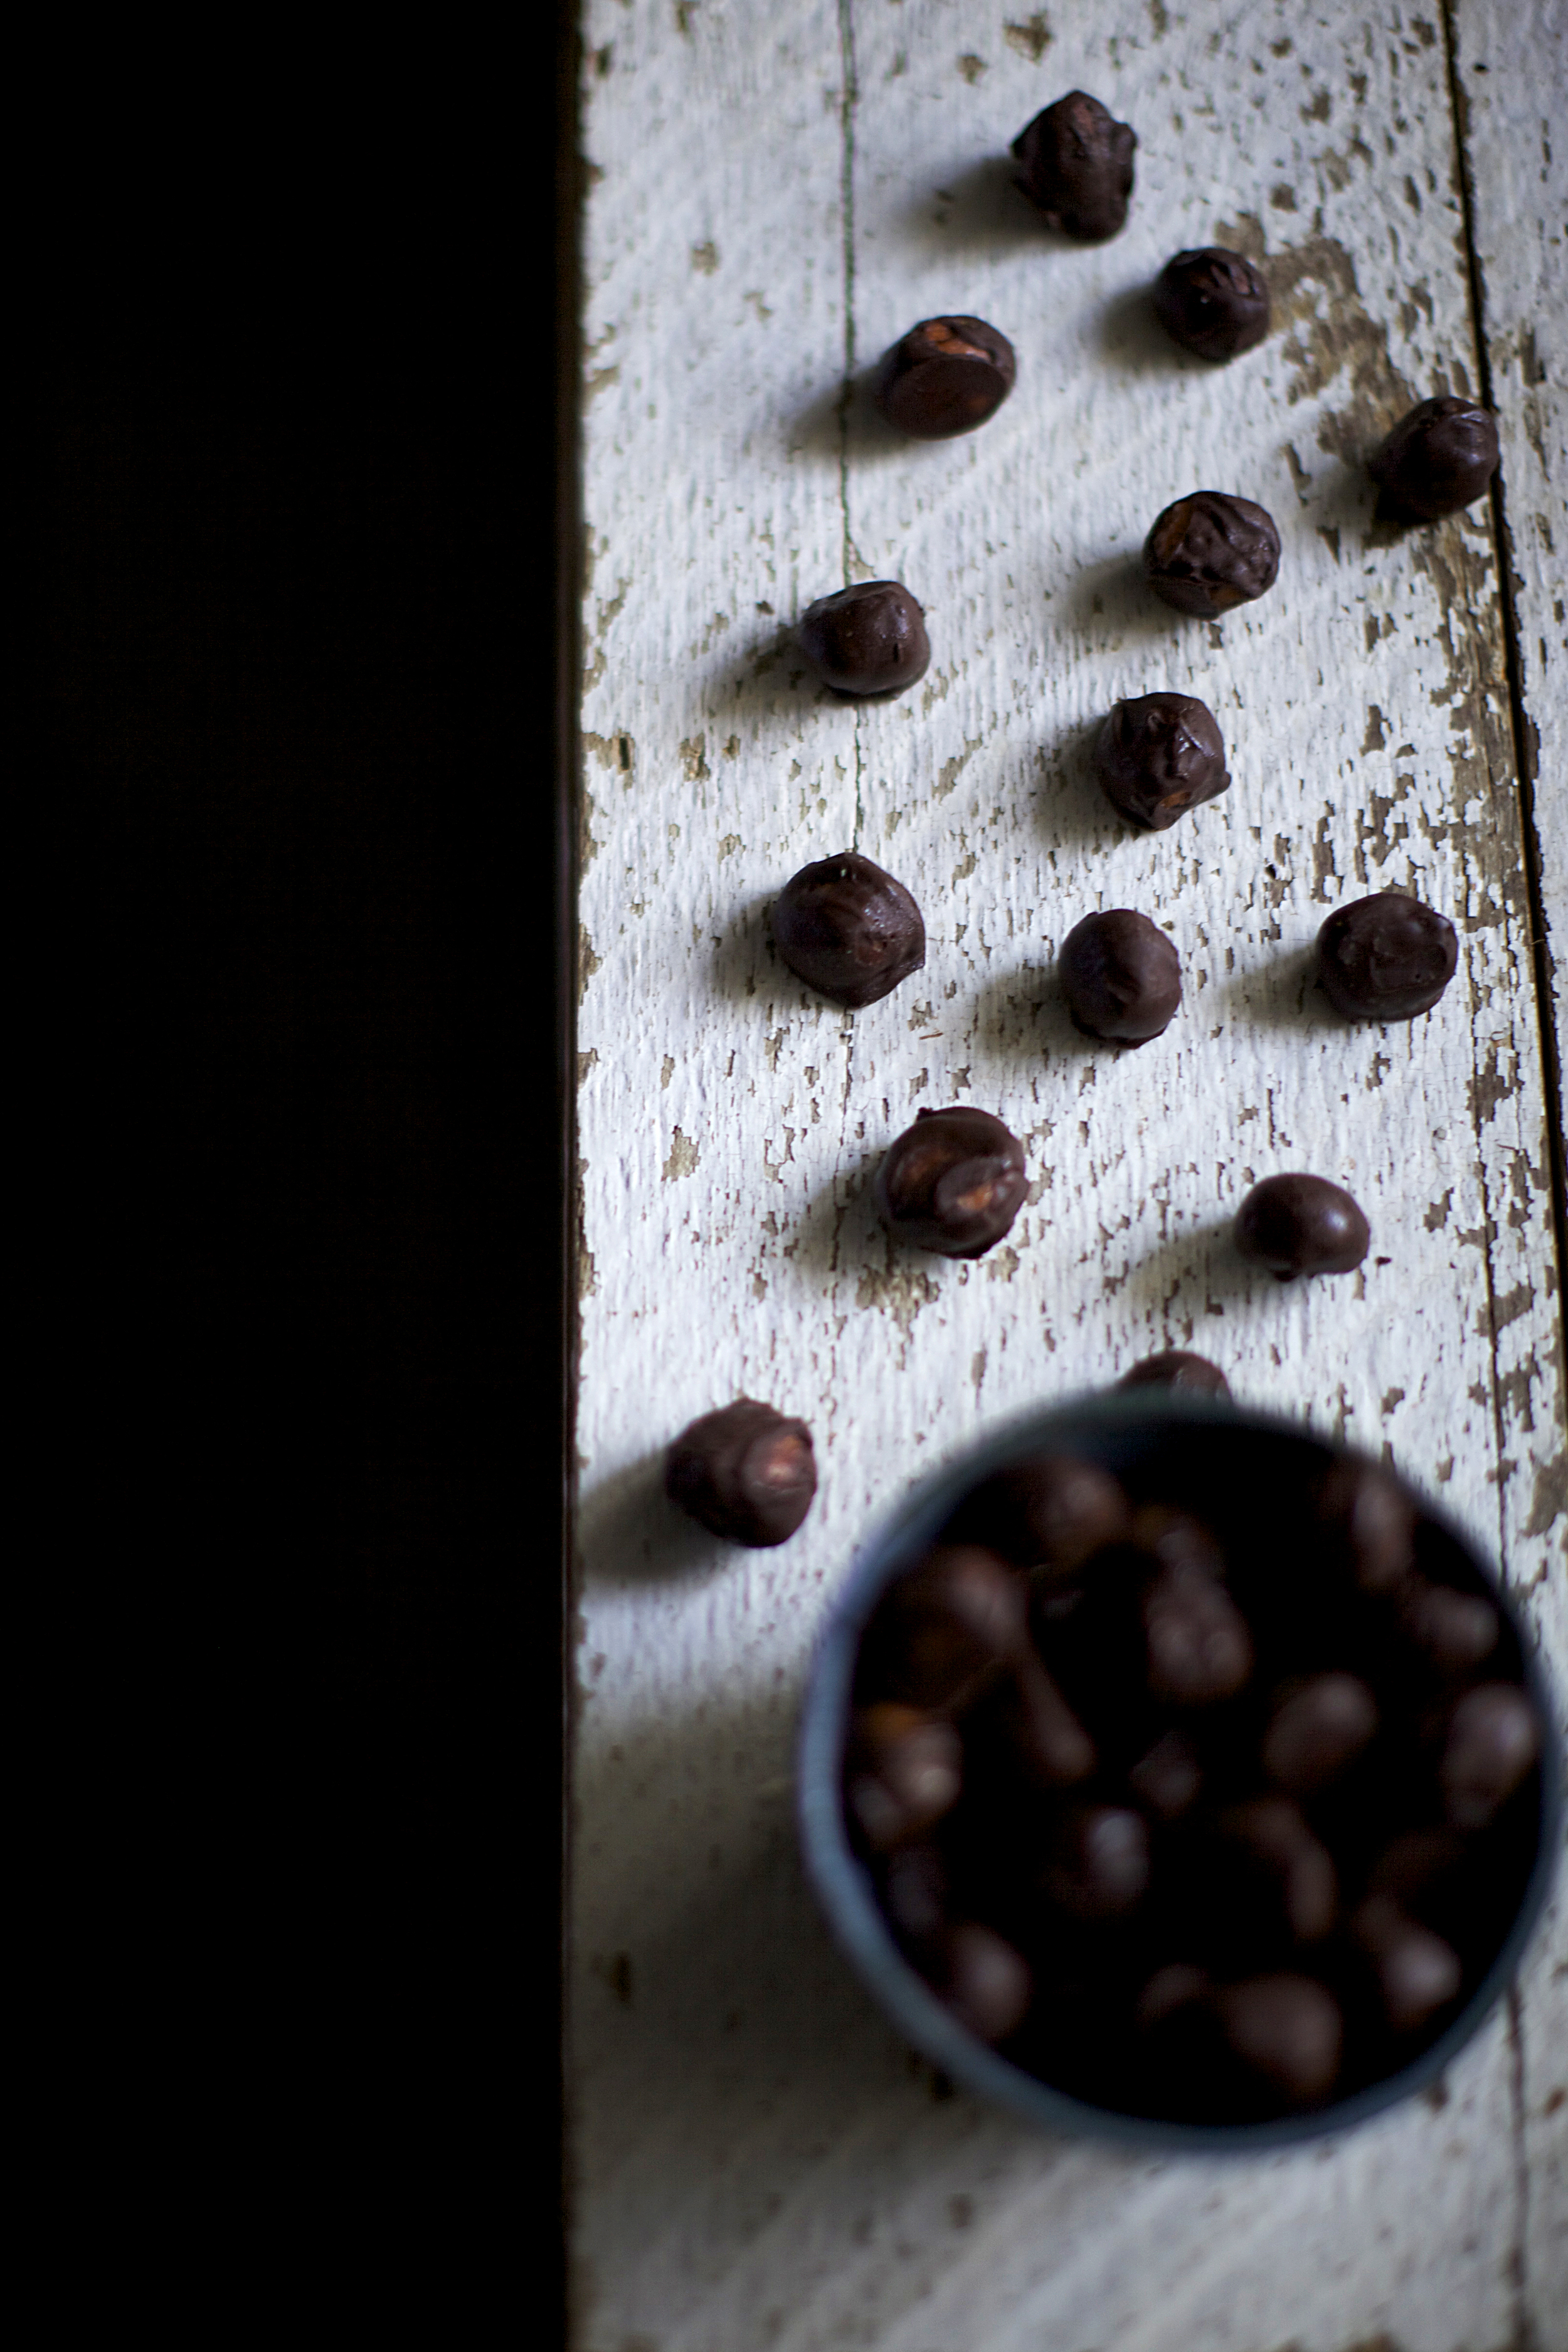
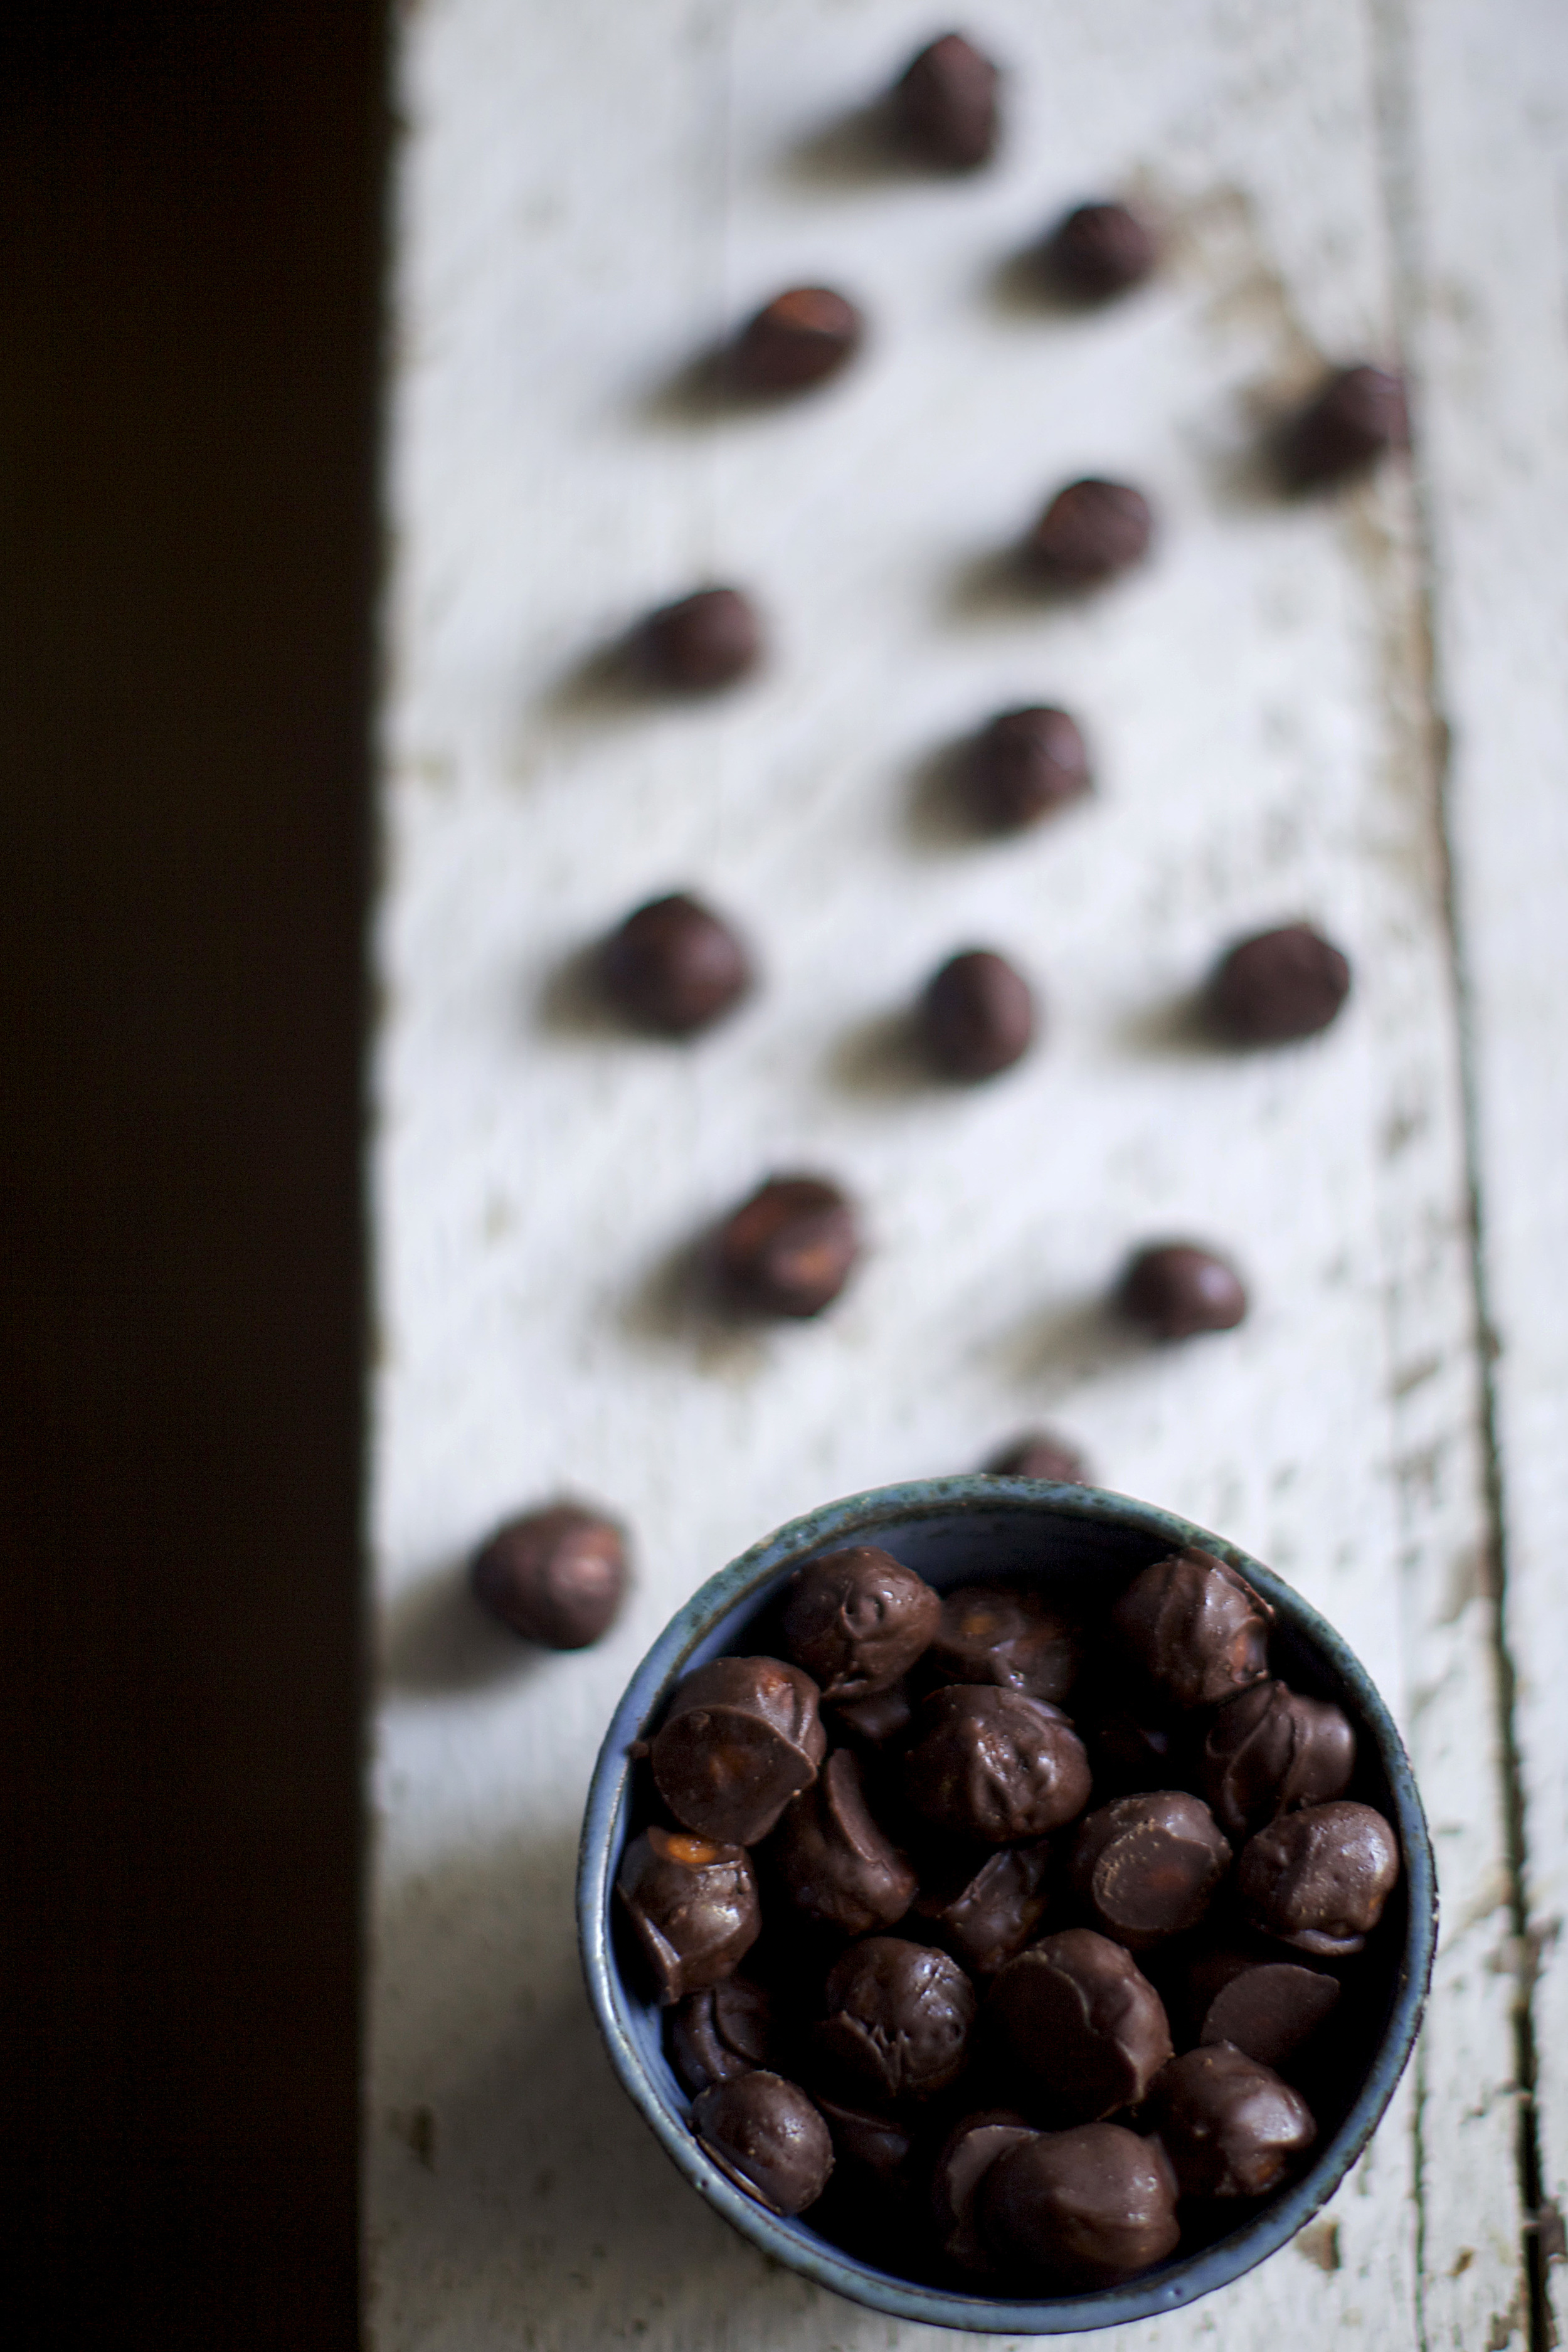
These peanut butter cup pots de creme one of the most satisfying desserts I've made in a while. Although pots de creme don't meet the varying temperature requirement on my dessert craveworthy-ness chart, they're one of my absolute favorite sweets. Super creamy, sinful and delectable, and really easy to boot! It's simple: mix hot cream and milk with some peanut butter and chocolate, then pour that over eggs yolks before being baking in baby cups halfway submerged in water. A quick three-hour chill sets the custards, and then they're ready to roll. I topped them off with some fresh whipped cream, chopped peanut butter cups, and spiced cocoa-glazed peanuts for balance and an extra crunch. If these aren't perfect,  don't know what is. 

If I haven't convinced you enough to have you mentally going through your fridge looking to see whether or not you've got all of the ingredients or you need to make a quick grocery run, I'm pretty concerned. Take my word: these are important. If peanut butter, isn't your thing, no worries! This recipe is an absolute showstopper and would work great with Nutella, salted caramel, peppermint bark, or even Valrhona Dulcey! Any which way you choose, just make it. I promise you'll understand.

peanut butter cup pots de creme // Glazed & Confused

Peanut Butter Cup Pots de Creme

  • 2 cups heavy whipping cream
  • 1/2 cup whole milk
  • 3 oz. creamy peanut butter 
  • 3 oz. Reese's chocolate peanut butter spread
  • 1/2 cup semisweet chocolate chips
  • 6 large egg yolks
  • 1/3 cup sugar

Directions: 

In a medium saucepan, combine the cream and milk over medium heat. Once the mixture is heated to a simmer, remove from the heat and stir in peanut butters and chocolate. Let the mixture melt and stir together until smooth. In a medium bowl, whisk together the egg yolks and sugar. Gradually add the hot mixture into the egg mixture, making sure not to cook the eggs. 

Preheat oven to 325F. Pour the mixture into 8 4-oz. serving jars and place in a deep baking pan. Fill the pan with hot water until the water reaches halfway up the jars. Bake about 45 minutes, until the custard is set, but still jiggles. Chill in the refrigerator for a tleast 3 hours before serving. Top with fresh whipped cream, peanut butter cups, and spiced cocoa glazed peanuts. 

Spiced Cocoa Glazed Peanuts 

  • 1 cup hot water 
  • 1/2 cup sugar 
  • 1 1/2 cup roasted salted peanuts
  • 1 tablespoon unsweetened cocoa powder
  • 3 teaspoons chili powder
  • 1/4 tsp. cayenne

Directions:

In a saucepan, combine the hot water and 1/4 cup of sugar until dissolved. Add the peanuts and let soak for 10 minutes. Remove from the water and add the dry ingredients to coat. Place the nuts on a baking sheet and bake at 350 for 10-15 minutes. 


Homemade Butterfinger BB's

Homemade Butterfinger BB's // Glazed & Confused

RING THE NEW SERIES ALARM!

You read that right, I'm launching a new recipe series that I'm super super excited about. I've been crazy inspired by junk food and my childhood lately. Growing up in the late 90s and early 2000s was the shit. I know that a lot of my peers whine about being born in the "wrong era," but I wouldn't trade my birth year for anything. (Seriously, how pretentious is that? #eyeroll) 

I could go on and on about my weird obsession with B*Witched or tell you every single HitClips single I had, but let's talk about the food real quick. I was quite the poster child for childhood obesity, so after school snacks were my life. I'd do anything to go back to a time where I could come home from my totally strenuous day of elementary school, grab a s'mores Chewy bar and a Pepsi Blue, and turn on TRL without feeling overwhelmed with guilt. You know, if TRL and Pepsi Blue were still around. I guess some things just have to change. 

Graham's Lunchbox is a new series that will explore, remake, and re-imagine all of my favorite childhood foods. The processed junk of my childhood far outweighs the snacks inhabiting the lunchboxes of schoolchildren nationwide today. Sure, Pumpkin Spice Oreos are hella delicious, but they don't have anything on Dunkaroos. Those fancy eighty-million-percent dark chocolate bars that I indulge in from time to time pale in comparison to the pure joy that was cracking open a Wonderball at age 8. And don't even get me started on Crispy M&M's. 

Homemade Butterfinger BB's // Glazed & Confused

Speaking of candy, did you guys know that you can make Butterfingers at home with only THREE ingredients? Don't ask me how it all works (although my personal theory is that it's some kind of sorcery via the candy gods), but equal parts melted candy corn and creamy peanut butter yields a glorious substance that is freakishly similar to an actual Butterfinger candy bar. I've seen the recipe on Pinterest for years, but never really thought much of it until it dawned on me that I could make my own version of my favorite childhood candy at home. So I did it. 

Yes, Graham Blackall just singlehandedly revived America's most-amazing-but-too-often-forgotten candy of yesteryear: the Butterfinger BB. Please hold your applause. 

It's recently come to my attention that some very unfortunate souls do not remember that sugary flawlessness that was the Butterfinger BB. Let me educate you. First introduced in 1996, Butterfinger BB's were essentially just little circular bits of your typical Butterfinger. They were delicious. (Much better than a regular Butterfinger even though they were the same thing.) I ate a lot of them. They had awesome commercials starring Bart Simpson. My life lost all purpose and became completely devoid of joy when they were discontinued in 2006. Nestle sort of revived them in 2009 in the form of Butterfinger Bites, but they're totally not the same thing. In 2014, I made them a thing again and it was glorious. 

The result? Instant throwback. It's actually kind of scary how good these are. I've been keeping them in the freezer and it's definitely been one of those situations where every single time I walk past my kitchen I have to restrain myself from getting one. and I'm failing. Miserably. (quelle surprise!) 

Homemade Butterfinger BB's // Glazed & Confused

Homemade Butterfinger BB's

  • 16 oz. creamy peanut butter
  • 16 oz. candy corn
  • melted semisweet chocolate for dipping 

In a medium bowl, microwave the peanut butter and candy corn for 1 minute. Stir the mixture to combine. Continue microwaving in 30 second bursts until the mixture is fully combined. Using a teaspoon, scoop the mixture and roll into balls. Place the bb's on a parchment-lined baking sheet and freeze. Once hardened, remove from freezer and dip into melted chocolate. Return the balls to the freezer to set the chocolate. 

Fluffernutter Sandwich Cookies

Welcome to the partially new Glazed & Confused! I've been toying around with my layout over the past few weeks and decided to finally make the switch this weekend. There's still some things to be added, redesigned, and put into place. A bigger post showcasing all of the new features and pretty things should be coming at the end of the week. Until then, let's talk cookies. 

I was going to wait another to make a post about these, but I just couldn't keep these away from you guys any bit longer.

IMG_2154.jpg

I have a confession, I've never had a legit fluffernutter sandwich. I'm going to go ahead and guess that it's just not a Southern thing? But don't worry, I got my fair share of ultra-fattening substances spread onto slices of bunny bread. Case in point: condensed milk sandwiches. I refuse to elaborate out of pure shame.

IMG_2187_2.jpg

It wasn't until I started baking that I discovered the (***)flawless combination that is peanut butter and marshmallow fluff. That shit is magical.

Naturally, the next step would be transform the fluffernutter sandwich into a dessert. I'll be honest, these cookies are nothing that innovative or different. They're just damn good

Fluffernutter Sandwich Cookies 

  • 7 tablespoons unsalted butter, room temperature
  • 1/2 cup sugar
  • 1/2 cup brown sugar
  • 1/2 cup creamy peanut butter (do not use natural peanut butter)
  • 1 egg
  • 1 tablespoon vanilla extract
  • 1 cup all purpose flour
  • 1/2 tsp baking soda
  • 1/4 tsp salt
  • 8 oz. semi-sweet chocolate, melted
  • 1 container of marshmallow fluff

Preheat oven to 350 F. Line a baking sheet with parchment paper.

In the bowl of a stand mixer fitted with the paddle attachment, cream together the butter and sugars until light and fluffy. Add in the peanut butter. Mix in the egg and vanilla. Add in all of the dry ingredients and combine. 

Scoop tablespoon-sized balls of cookie dough onto the prepared baking sheet. Bake cookies for 10 minutes. Add a sprinkle of sea salt on top of each cookie. Don't leave that out! 

Once cool, spread a small amount of marshmallow fluff in between each cookies. Move cookies to fridge for 30 minutes. Afterwards, dip each cookie into the melted semi-sweet chocolate and place on wax paper. Once set, enjoy with a huge glass of milk.