cake

blood orange mimosa cake — #madewithchobani

blood orange mimosa cake — blood orange chobani yogurt cake, champagne whipped cream, and blood orange dessert caviar // Glazed & Confused // #MadeWithChobani

Do you ever feel like everything is moving in hyper speed?

I'm having a hard time believing that it's 2015 already. Like, can somebody please teach me how to stop writing 2014 on everysingleassignment. that my glittery One Direction pens touch? Forging the number 4 into a 5 makes for an absolute atrocity and my obsessive compulsive ways have been tested beyond their limits lately. To any of my classmates or teachers reading this, I apologize in advance for any sporadic outbursts featuring some, errrr, colorful language. 

Looseleaf-induced drama aside, my life seems to be in a state of eternal fast forward as of late. The holidays came and went in virtually no time, leaving me with a feeling of constant exhaustion and general delusion that I can only describe as a holiday hangover. My symptoms are near identical to the hell that is the morning after getting a little too... turnt, for lack of another word. (Minus all of the drunk text regret, thank GOD.) 

how to make dessert caviar // Glazed & Confused
blood orange dessert caviar // Glazed & Confused

A few weeks back, Chobani contacted me to take part in their #MadeWithChobani campaign and create an extra special recipe using their signature greek yogurt as a key ingredient. Given that I've been in desperate need of a lazy Sunday brunch and am a definite advocate for kicking a hangover with extra alcohol, I decided to cure my ailments with a mimosa cake. (Disclaimer: they also wanted something relatively healthy, but I'm a firm believer that: 1, cake is good for the soul and 2, calories don't count when you're curing a hangover. Duh!) 

blood orange mimosa cake — blood orange chobani yogurt cake, champagne whipped cream, and blood orange dessert caviar // Glazed & Confused // #MadeWithChobani

This one-layer boozy citrus situation was inspired by this satsuma yogurt cake, a lesser-known gem from when I first started blogging. (Fun story: I've eaten that whole cake in one sitting on two separate occasions; it's that addictive.) I adapted that recipe to create a blood-orange scented cake made with Chobani's plain greek yogurt, topped it with a surprisingly light and airy champagne whipped cream, and then went all science-y and made blood orange "caviar" because champagne and caviar and honestly, who doesn't love a little extra drama. 

blood orange mimosa cake — blood orange chobani yogurt cake, champagne whipped cream, and blood orange dessert caviar // Glazed & Confused // #MadeWithChobani

Graham's Notes: 

  • I've always been enamored by the general drama of blood oranges, so I decided to replace traditional orange orange juice with the juice of some freshly-squeezed blood oranges. They're so delicious and perfectly ripe around this time of the year, so I recommend you use them. If you're not into them, no worries, you can always use traditional navel oranges. 
  • Please don't forget to add the vegetable oil at the end of the batter-making process. I did that on two separate occasions. *facepalm* 
This recipe was created in conjunction with Chobani Greek Yogurt for their #MadeWithChobani campaign, though all opinions about the deliciousness of their yogurt are my own. Take a look at what other bloggers have been dishing up by searching #MadeW…

This recipe was created in conjunction with Chobani Greek Yogurt for their #MadeWithChobani campaign, though all opinions about the deliciousness of their yogurt are my own. Take a look at what other bloggers have been dishing up by searching #MadeWithChobani on Instagram! 


Blood Orange Scented Yogurt Cake 

  • 1 cup sugar
  • 3/4 cup Chobani plain greek yogurt 
  • 4 small blood oranges, zested 
  • 3 large eggs
  • 1 tsp. vanilla paste or extract 
  • 1 cup all purpose flour
  • 1/2 cup cake flour
  • 2 tsp. baking powder
  • 1/4 tsp. fine salt 
  • 1/3 cup vegetable oil
  • 1/4 cup freshly-squeezed blood orange juice
  • 2 tablespoons sugar 

make: 

Preheat oven to 350° F. Line a 9" round cake pan with parchment and lightly grease and flour. 

In a medium-sized bowl, whisk together the sugar, greek yogurt, and orange zest until smooth and fragrant. Stir in the eggs and vanilla. Sift in the flours, baking powder, and salt and mix until just fully combined. Finally, stir in the the vegetable oil. Pour the batter into the prepared pan and bake until a toothpick inserted into the center of the cake comes out clean, about 30 minutes. 

While the cake is cooling, combine the blood orange juice and sugar in a small saucepan. Over medium heat, cook until the mixture thickens and forms a syrup, about 5-10 minutes. Immediately pour and brush over the top of the cake. 


Champagne Whipped Cream

  • 1 cup heavy cream, chilled
  • 1/4 cup champagne
  • 1/4 cup confectioners' sugar 

make:

In the bowl of a stand mixer fitted with the whisk attachment, the cream, champagne, and sugar until soft peaks form. Spoon onto the top of the cake and top with blood orange caviar. 


Blood Orange Caviar 

(adapted and inspired by Sprinkle Bakes

  • 2-3 cups vegetable oil
  • 2 1/4 oz. packets of powdered gelatin 
  • 3 tablespoons cold water
  • 3 oz. blood orange juice 
  • ice
  • 1/4 cup coarse salt for ice bath
  • a small squeeze bottle 

make:

Refrigerate the vegetable oil for at least 24 hours. The oil must be very cold to properly set up the gelatin for the caviar. When you're ready to make the caviar, fill a bowl with ice, cold water, and the salt to create an ice bath. Place the bowl of cold vegetable oil in the middle of the ice bath. 

Mix together the gelatin and cold water until no lumps are left. Set aside. 

On a stovetop over a medium-low flame, heat the orange juice until warm to the touch. (You can also do this in the microwave.) Once warm, whisk the juice into the gelatin mixture and stir until the gelatin is melted and the mixture is smooth. Transfer this liquid into your squeeze bottle and let come to room temperature. 

Using the squeeze bottle, drop the orange gelatin liquid into the oil until balls forms. They will eventually sink to the bottom. Repeat the process until you have enough, then scoop them out of the oil and drain through a mesh sieve. Use immediately on top of the whipped ream or store refrigerated with excess oil for up to 10 days. 


Chicken & Waffles Cake + my blog birthday!

Chicken & Waffles Cake — yellow buttermilk cake, maple frosting, spicy sage caramel // Glazed & Confused

Cue the confetti emojis, it's my first birthday! 

Okay not me, but Glazed & Confused officially turns one today and I'm feeling like a really proud mom. Like, Regina George's mom-level proudness.  A year ago, I didn't really know the exact route I wanted to take with this site, but I felt an overwhelming need to document my rapidly-evolving life. And so so so much has changed since my first posts.

When I started posting, I played it safe, doing that sort of blogging-by-number routine that I figured would generate into success. But something just didn't feel right, it felt hollow. I wasn't putting myself into my posts. For a long time, I struggled on how much of my personality I should put into my posts, fearing that people would be turned off by my personality because let's face it, I'm no Pioneer Woman. I'm an overdramatic, pop culture-obsessed, sometimes awkward, always outlandish 20-year-old boy who wears way too many nipple-exposing shirts and sometimes likes to walk around Walmart in a wig. A risky sell, surely. But then something happened; earlier this year, I had a breakthrough when I stumbled upon Molly's blog. After perusing through her (crazy delicious and personal and honest and hilarious) site, I realized I was missing out on being myself. The boy behind the blog thus far wasn't me at all, and I wasn't happy with it. That day, I made a promise to myself to be the unfiltered Graham that I'd always wanted to be online and it's been absolutely wonderful ever since. I now have absolutely no qualms with doing crazy Graham things, like baking a cake for Harry Styles

The past few months, in particular, have been especially amazing. I've been so passionate about blogging and have been planning so many crazy new posts for you guys. From being hand-selected to be part of a blogger showcase with West Elm to the cool press stuff to the countless relationships I've made online with you guys, I've achieved so much in such a short span of time and I'm so excited to do even bigger and better things in the future. Get ready.  

Chicken & Waffles Cake — yellow buttermilk cake, maple frosting, spicy sage caramel // Glazed & Confused

Okay, enough with the sappy blog reflection talk — let's talk about this cake. You all should know by now that I live for a special occasion, especially one that involves celebratory dessert. But don't be fooled, celebratory desserts aren't only for special occasions. Sometimes I like to celebrate not-so-special occasions, like Mondays or Tuesdays or Wednesdays or.... you get the point. But since today is such an important day, I should have such an important cake, right? And what's more important than a Chicken & Waffles Cake? Uh, nothing. 

I've been thinking about this cake nonstop since the Great Blog Brainstorm of Summer 2014, but couldn't find an occasion appropriate enough for this level of gluttony. I know what you're all thinking right now: "Okay Graham, this is totally absurd." And yes, I know — chicken and waffles in cake form is probably the most unhealthy and seemingly repulsive thing I've posted to date, but I sure as hell know that 99% of you kiiiinda want to taste it. Really, don't knock it until you try it. It's next-level delicious. 

Chicken & Waffles Cake — yellow buttermilk cake, maple frosting, spicy sage caramel // Glazed & Confused
spicy sage caramel sauce // Glazed & Confused

Here's a little rundown of the components of this cake: a buttery and refreshingly-moist yellow buttermilk cake, topped with maple syrup buttercream frosting, a spicy salted caramel with cayenne, black pepper, and lots of sage for some true poultry flavor, topped with actual chicken nuggets and a freaking belgian waffle. (Let's talk about how I used chicken nuggets as a cake garnish... absolutely absurd, indeed.)

So grab your forks and hide your scales, because chicken & waffles cake is a thing now. 

Chicken & Waffles Cake — yellow buttermilk cake, maple frosting, spicy sage caramel // Glazed & Confused

Vanilla Buttermilk Cake 

(via Sweetapolita

  • 4 whole eggs, room temperature
  • 2 egg yolks, room temperature
  • 1-1/4 cups buttermilk, room temperature
  • 2 teaspoons vanilla extract
  • 3 cups cake flour, sifted
  • 2 cups granulated sugar
  • 1 tablespoon plus 1/2 teaspoon baking powder
  • 1/2 teaspoon salt
  • 1 cup (2 sticks) unsalted butter,  room temperature

Preheat oven to 350° F. Grease and flour the bottom and sides of a 9x13" baking pan.  

In a medium bowl, combine the eggs, yolks, 1/4 cup of the buttermilk and the vanilla. Whisk to blend well.

In the bowl of a stand mixer fitted with the paddle attachment, combine the flour, sugar, baking powder and salt . Add the butter and the remaining 1 cup buttermilk to the dry ingredients and with the mixer on low, blend together. Raise the mixer speed to medium and beat until light and fluffy, about 2 minutes.

Add the egg mixture in 3 additions, scraping down the side of the bowl and mixing only until thoroughly incorporated.

Pour batter into the prepared pan. Bake the cake layers for 35 minutes, or until a cake tester or wooden toothpick inserted into the center comes clean and the cake begins to pull away from the sides of the pan. Let the layers cool in the pans for 10 minutes, then carefully turn out onto wire rack and let cool completely. 

Maple Syrup Buttercream 

  • 1 cup (2 sticks) unsalted butter, room temperature
  • 1 cup maple syrup
  • 3/4 cup confectioners' sugar
  • 1 tsp. vanilla extract
  • 1/4 tsp. salt

In the bowl of a stand mixer fitted with the whisk attachment, mix together all of the ingredients on low speed until the butter is broken up and combined. Then, increase the speed to medium-high and mix for about 5 minutes. Set aside.

Spicy Sage Caramel 

  • 1 cup granulated sugar
  • 6 tablespoons unsalted butter, cut into cubes
  • 1/2 cup heavy cream
  • 1 tsp. salt
  • 1/2 tsp. ground black pepper
  • 1/2 tsp. dried sage
  • 1/8 - 1/4 tsp. cayenne 

In a small sauce pan, heat the sugar on medium heat until it dissolved and turns amber in color, mixing constantly. Add the butter and stir continuously until the butter and caramel are combined. Slowly mix in the heavy cream and stir until combined. Allow the mixture to boil for 1 minute. Remove from heat, and stir in the salt, pepper, sage, and cayenne. Pour into a glass jar and refrigerate until cool. 

Extras + Assembly 

  • cake soak (mix 1/4 cup milk with 1 tsp. butter vanilla extract)
  • chicken nuggets  (you can fry your own or buy them, no judgment)
  • belgian waffles

(If you're making this in two 9-inch rounds, you can ice the cake as you would normally. If you want to make this Milk Bar-style like me, continue on) 

  1. Invert the cake onto a sheet of parchment paper or silpat, and peel off the parchment paper backing. Using the 6-inch cake ring, stamp out two circles from the cake. These will be the top and middle layers. The remaining cake "scrap' will come together to make the bottom layer of the cake.
  2. Clean the cake ring and place it on a sheet of parchment paper or silpat atop a baking sheet. Use one strip of acetate to line the inside of the cake ring. Put the cake scraps in the ring and use the back of your hand to press the scraps together into a flat even later.
  3. Dunk the pastry brush in the cake soak and give the layer of scraps a good, healthy bath of half of the soak.
  4. Spread one third of the maple syrup frosting over the base layer. Then drizzle with one-third of the caramel evenly over the top of the frosting. Use the back of your spoon to spread the caramel over the layer.
  5. With your index finger, gently tuck the second strip of acetate between the cake ring and the top 1/4 inch of the first strip of acetate, so that you have a clear ring of acetate 5-6 inches tall- high enough to support the height of the finished cake. Top with a full circle of cake (save the nicest one for the top layer), brush the rest of the cake soak over this layer, top with another one third of the frosting and one third of the caramel.
  6. Nestle the remaining cake round into the frosting. Cover the top of the cake with the remainder of the frosting. Give it volume and swirls, or opt for the perfectly flat to. 
  7. Freeze the cake for at least 12 hours to set the cake and filling. (And to make the unmolding much easier.)
  8. Three hours before serving, pull the pan from the freezer, and using your fingers and thumbs, pop the cake out of the cake ring. Gently peel off the acetate and transfer the cake to a platter or cake stand. Let it defrost in the fridge for a minimum of 3 hours. (wrapped well in plastic, it can be refrigerated for up to 5 days.)
  9. Once thawed, decorate the cake with chicken nuggets, belgian waffle pieces, and extra caramel. 

The Half-Baked Cake: a Cookie Dough explosion

So I find myself repeatedly doing this thing where I announce that I am "back to blogging" on a more scheduled and regular basis. A week later, and poof! I'm gone. Vanished. To give myself some credit, I've been going from place to place to place every day of my life since this semester started. I've been so disoriented that I literally forgot my calculator for my math final... yeah. 

Well, that stops here. Shit is about to get real crazy around here because IT'S FINALLY SUMMER! (Picture me screaming and dancing right now, because I am.) I cannot even believe it. No really, it hasn't hit me yet. On Wednesday, I took my very last final and could immediately feel my breath returning to normal for the first time since January. This semester was insane. Like... bat shit crazy insane. But hard work pays off. 

After a semester from hell, I am determined to make this summer amazing. I mean, having no school until the very last week of August is a reward in itself, but I've got even bigger things planned. On Monday, I start my internship with the Besh Restaurant Group. (Yep. THE John Besh) Being that I essentially go out to eat for a living, I couldn't be more excited to start working in the food industry. At the end of the month, I'm heading off to Europe for a big, much-needed two week vacation throughout Italy, Greece, Turkey, and a stop in Amsterdam. After that, I've got plenty of special projects, photography gigs, concerts (hello Beyonce and Jay Z), pool parties, and hopefully one too many mojitos. It shall be great. 

IMG_2322.jpg

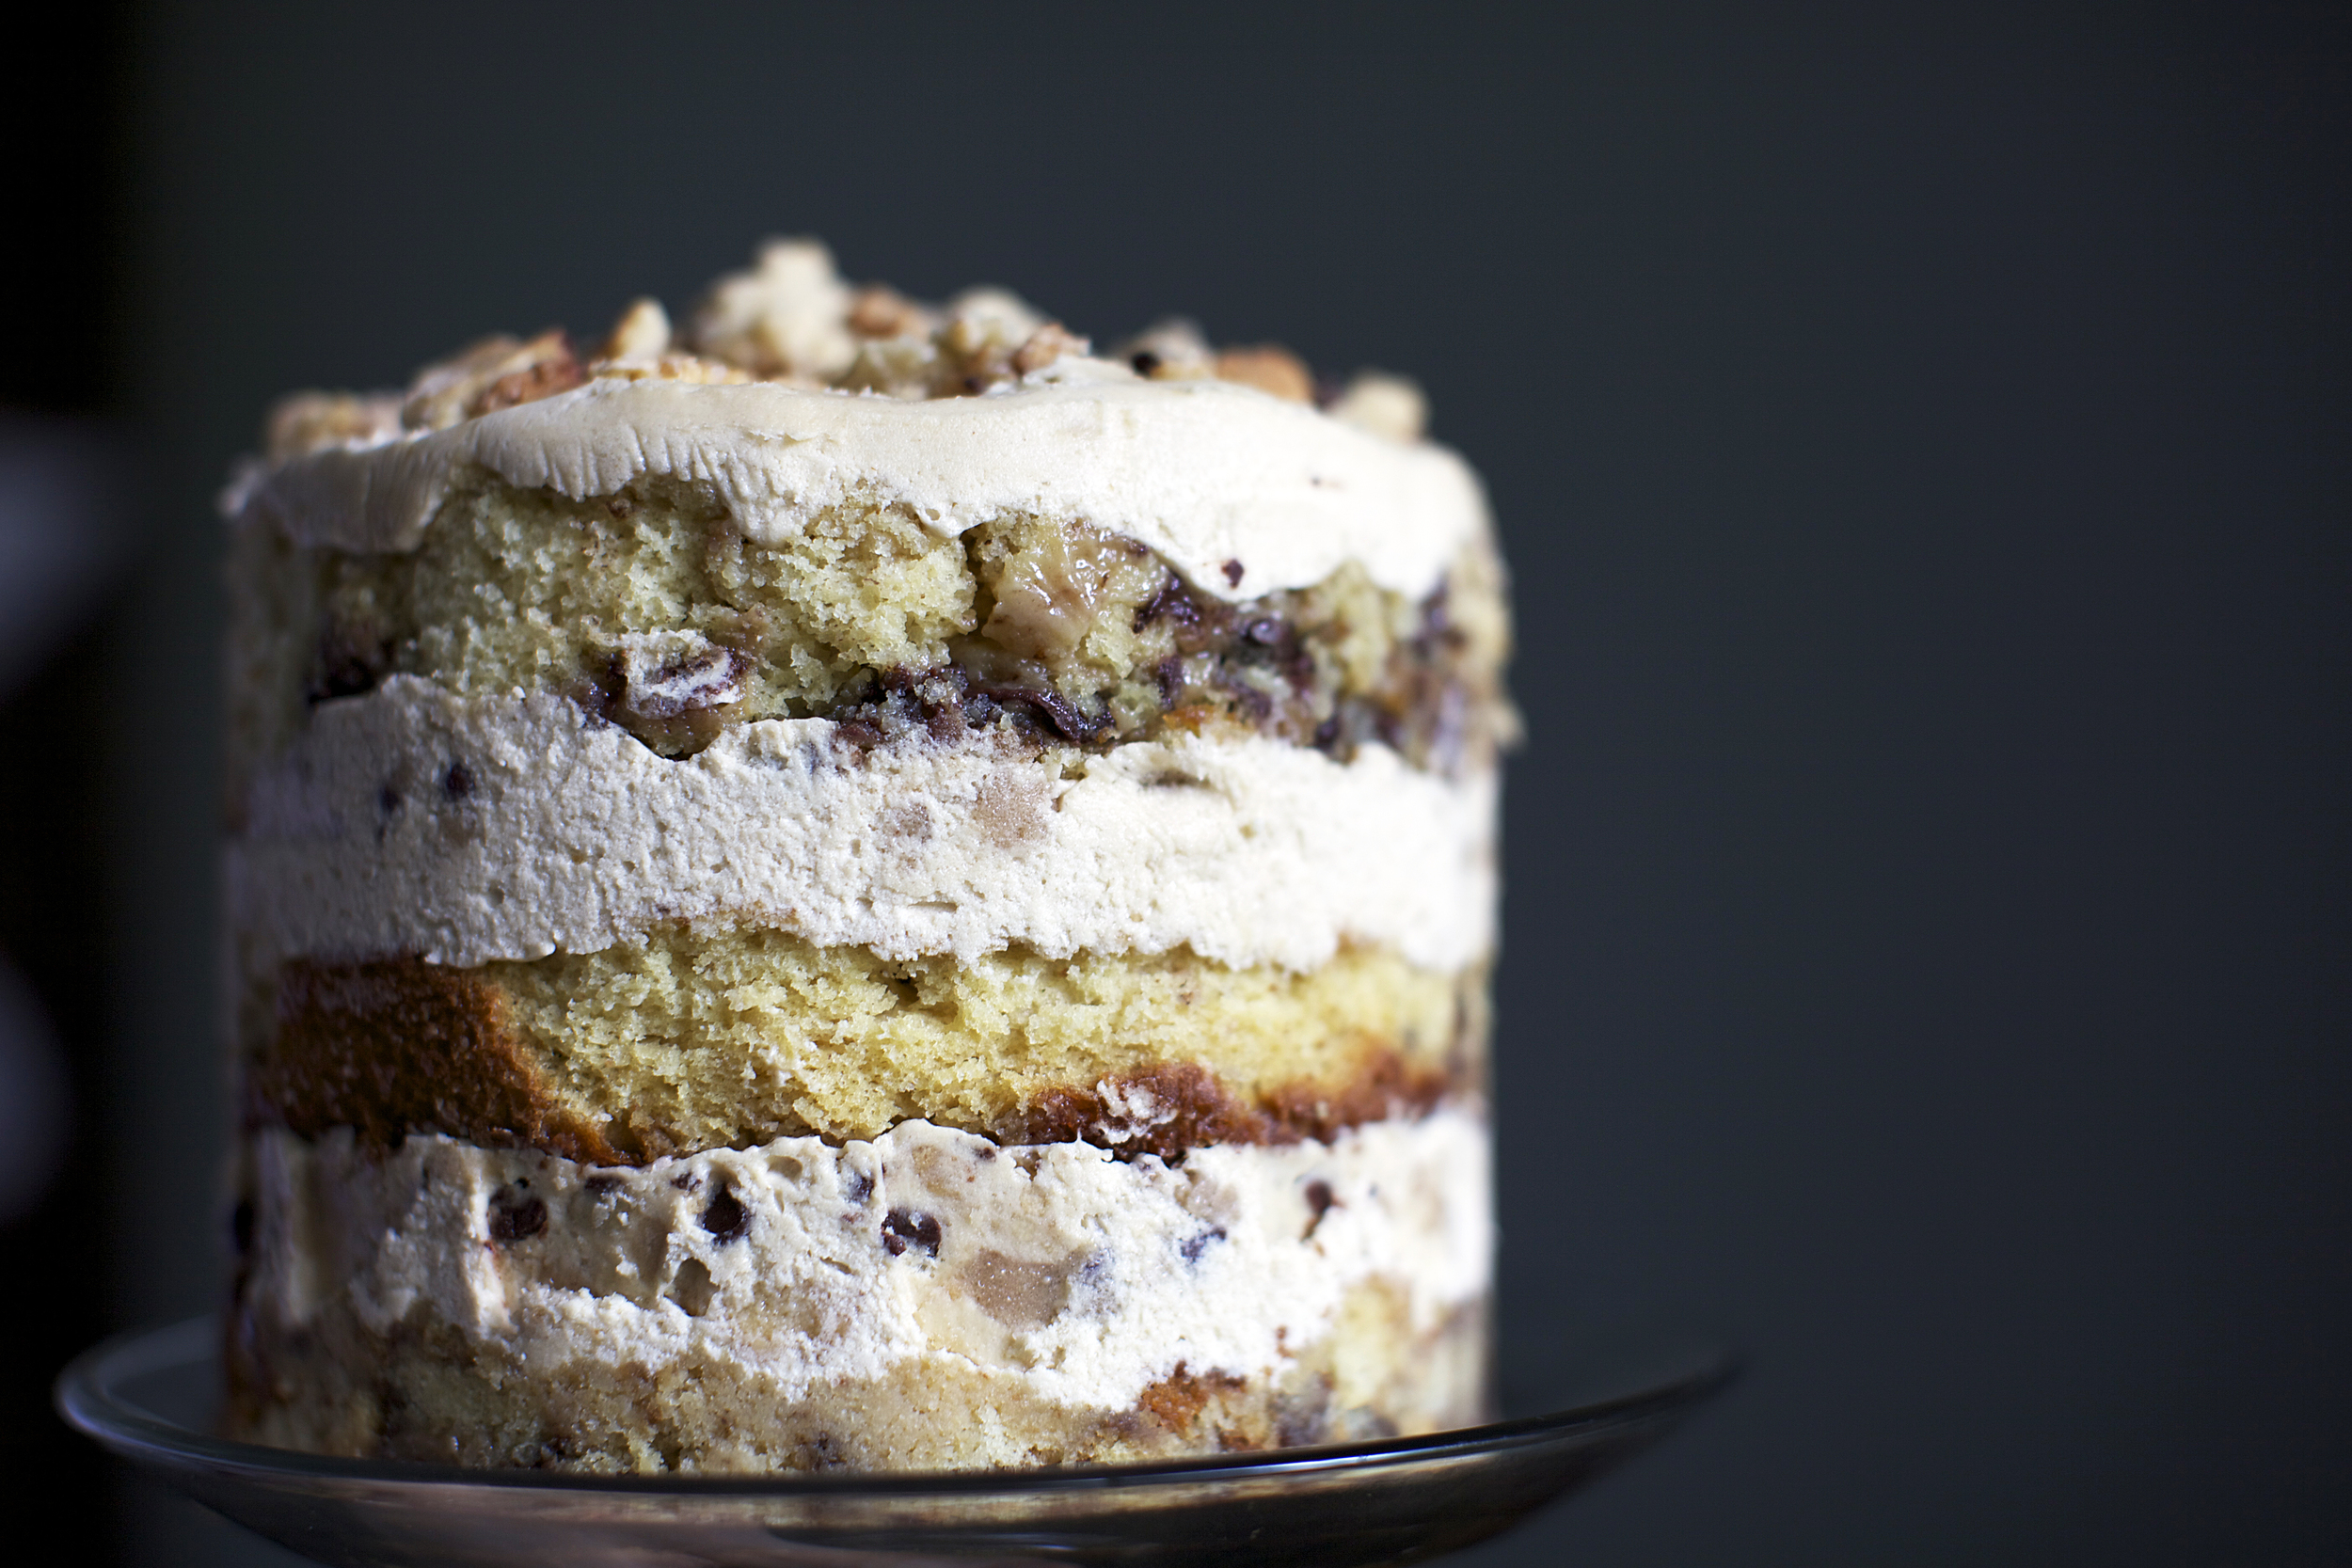
But in the meantime, it's time to celebrate! And what's a celebration without cake? (Don't answer that. Actually, don't even imagine that tragic.) I figured that the best way to welcome in summer was by putting a giant dent in my diet with something absurdly decadent and over-the-top. I think I succeeded. Drumroll please.... welcome the Half Baked Cake. 

My inspiration for this cake came as I was ordering my weekly Pinkberry fix. There's an art to creating the perfect combination of yogurt and topping. After getting my yogurt, my eyes darted back and forth and back and forth through the spread of sugary accoutrements I could add on top. Inside my head, there was an intense discourse:


I probably should just be good and get fruit today.

Wait but those chocolate wafer rolls...

One of everything can't hurt right? Wait no, I can't do that.

Oh my god are those cookie dough bites?

*Cue scene* 


IMG_2385.jpg
IMG_2365.jpg

 Like many of you, I'm a cookie dough addict — I probably eat about two or three cookies in just dough alone whenever I whip up a batch. This is coming from the hypochondriac child who steadfastly swore against the consumption of raw eggs due to his debilitating fear of contracting salmonella. The boy who still refuses to touch raw chicken, even if it's wrapped in another bag inside of a grocery bag. (I know, I'm dramatic.) But hey, at least I got over the raw egg thing. 

IMG_2352.jpg
IMG_2379.jpg

This cake is absurd. No really. It's just so.... extra. This cake does the most. Let me explain why:

1) There's brown sugar in every single element of this cake. Brown sugar cake, brown sugar icing, brown sugar crumb. 

2) The icing tastes like straight up cookie dough.

3) There is cookie dough in between the layers. 

4) There are chunks of gooey-cookie dough baked in the actual cake. 

5) I made the decision to assemble the cake Momofuku Milk Bar style.


Absolutely perfect. Brb, going to the gym. 


Cookie Dough

  • 1/2 cup (1 stick) salted butter 
  • 1 cup light brown sugar, packed 
  • 2 tsp. vanilla extract 
  • 1 cup all-purpose flour 
  • 1 tsp. salt 
  • 1 cup miniature chocolate chips

In the bowl of a stand mixer fitted with the paddle attachment,  cream together the butter and brown sugar until light and fluffy. Mix in the vanilla. Gradually add in the flour and salt. Fold in chocolate chips. Form the dough into a thin rectangle, about 1/4-1/2 inch thick. Wrap in plastic wrap and transfer to the freezer until solid, 30+ minutes. 

Cookie Dough Cake 

  • 2 2/3 cups cake flour
  • 1 tsp. baking soda 
  • 2 tsp. baking powder 
  • 3/4 teaspoon salt 
  • 6 tablespoons unsalted butter, room temperature 
  • 1 cup brown sugar, packed 
  • 3 eggs 
  • 1/3 cup vegetable oil 
  • 2 tsp. vanilla extract 
  • 1 1/2 cups whole milk

Preheat oven to 350 degrees F. Grease and flour one 9x13 cake pan or two 9-inch cake pans. In a mixing bowl, whisk together cake flour, baking soda, powder, and salt. Set aside.

In a the bowl of a stand mixer, cream together the butter and brown sugar until light and fluffy. Add in the eggs one by one. Mix in the vegetable oil and vanilla. Gradually add in the dry ingredients in three parts alternately with the milk. (A third of the dry ingredients, half of the milk, another third of the dry ingredients, the rest of the milk, the rest of the dry ingredients.) Remove two-thirds of the cookie dough from the freezer and cut into small 1/4-inch cubes, gently fold them into the batter.

Pour the batter into the prepared pan(s). For a 9x13, bake for 30 minutes. For two 9-inch rounds, bake for 35-40 minutes. Remove pans from oven and cool. 

Cookie Dough Buttercream 

  • 1/2 cup (1 stick) unsalted butter, room temperature
  • 3/4 cup brown sugar, packed
  • 1 tsp. vanilla extract
  • 1 1/4 cups all-purpose flour
  • 1/2 tsp salt
  • 4 tablespoons milk 

In a the bowl of a stand mixer fitted with the paddle attachment, cream together butter and brown sugar until light and fluffy. Add in vanilla. Mix in flour and salt. Add in milk until desired consistency is reached. 

Assembly 

(If you're making this in two 9-inch rounds, you can ice the cake as you would normally. If you want to make this Milk Bar-style like me, continue on) 

  1. Invert the cake onto a sheet of parchment paper or silpat, and peel off the parchment paper backing. Using the 6-inch cake ring, stamp out two circles from the cake. These will be the top and middle layers. The remaining cake "scrap' will come together to make the bottom layer of the cake.
  2. Clean the cake ring and place it on a sheet of parchment paper or silpat atop a baking sheet. Use one strip of acetate to line the inside of the cake ring. Put the cake scraps in the ring and use the back of your hand to press the scraps together into a flat even later.
  3. Mix the vanilla cake soak. (1/4 cup milk, 1 tablespoon vanilla). Dunk the pastry brush in the cake soak and give the layer of scraps a good, healthy bath of half of the soak.
  4. Spread one fifth of the brown sugar frosting over the base layer. Then sprinkle with one-third of the cookie dough evenly over the top of the frosting. Use the back of your hand to anchor them in place. Top with another fifth of the frosting, carefully spreading it so that it is even, but without disturbing the cookie dough.
  5. With your index finger, gently tuck the second strip of acetate between the cake ring and the top 1/4 inch of the first strip of acetate, so that you have a clear ring of acetate 5-6 inches tall- high enough to support the height of the finished cake. Top with a full circle of cake (save the nicest one for the top layer), brush the rest of the cake soak over this layer, top with another one fifth of the frosting, one third of the cookie dough, and another one fifth of the frosting.
  6. Nestle the remaining cake round into the frosting. Cover the top of the cake with the last fifth of the frosting. Give it volume and swirls, or opt for the perfectly flat top. Garnish the frosting with the remaining cookie dough.
  7. Freeze the cake for at least 12 hours to set the cake and filling. (And to make the unmolding much easier.)
  8. Three hours before serving, pull the pan from the freezer, and using your fingers and thumbs, pop the cake out of the cake ring. Gently peel off the acetate and transfer the cake to a platter or cake stand. Let it defrost in the fridge for a minimum of 3 hours. (wrapped well in plastic, it can be refrigerated for up to 5 days.)